What is XRF?
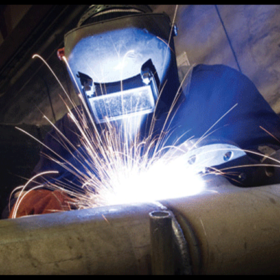
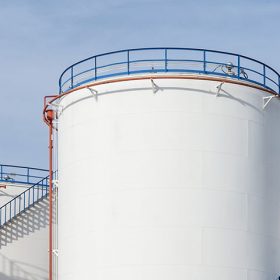
XRF is a non-destructive analytical technique used to determine the elemental composition of materials. This technology is used in mining and exploration, positive material identification in energy industry, manufacturing, manufacturing and metal recycling, precious metal analysis and jewelry, Supervision of enforcement of regulations on consumer safety as well as other industries.
The XRF analyzer determines the chemistry of the sample using the X-ray fluorescence emitted from the sample when the sample is excited by a primary X-ray source. Each element present in the sample produces an X-ray ensemble with a characteristic fluorescence spectrum that is unique ("fingerprint") for the particular element, which is why XRF spectroscopy is such an excellent technology for qualitative and quantitative analysis of material composition.
When to calibrate XRF equipment?
But The instrument must be calibrated to ensure accurate results. Calibration is the process by which you confirm that your measurements are correct by measuring on a standard sample. Calibration is usually performed on the instrument before it is distributed to the user. And although portable XRF analyzers like VANTA usually quite rugged, sometimes equipment used in harsh environments will degrade over time and need periodic recalibration.
Then it is necessary to continuously check, adjust or determine by comparison with the standard of the instrument's accuracy. You should follow the manufacturer's recommendations for recalibration and consider the operating environment, usage, and history of the instrument. Companies may be required to adhere to a calibration schedule to ensure compliance with the ISO Quality Document. For example, ISO/IEC 17025:2005 regulation “General requirements for competence to perform tests and/or calibrations, including sampling. It includes testing and calibrations performed using standard methods, non-standard methods, and laboratory-developed methods.”
In general, recalibration should be performed annually to ensure that measurements are accurate within the device's specification limits as it came out of the factory.
However, recalibration should only be performed by qualified technicians specified by the manufacturer. Do not attempt to open the device as you may damage or may void the warranty. Manufacturers can also provide calibration certificates to assure customers that you are doing your material verification properly.
In addition to instrument calibration, the manufacturer also provides hardware testing and maintenance testing to ensure everything is working to factory specifications. Trained technicians will inspect the case to make sure there are no cracks or damage, make sure the touch screen is working properly, and check all connections. In addition, the brightness of the LCD should be checked, the power on and off button, the navigation knob is working properly, the camera (if any) should be in focus, and the battery should be checked to make sure it can be fully charged and saved.
Why is it necessary to calibrate XRF equipment periodically?
Want to skip calibration and maintenance because you can't do your day-to-day tasks without an XRF analyzer — and delay sending it in for calibration? Our advice is “Don't do it!”. Many negative consequences can occur if the measurements are not within tolerance. If your analyzer is not operating at peak performance, you run the risk of inaccurate measurements and unqualified materials entering the production process and reaching the customer. Correction costs may add up because you need to rework the product or delay delivery. All of these situations can lead to unhappy customers, damaging your business and your brand.
Please contact VISCO to conduct an annual calibration and certification program to ensure your XRF analyzer is within the proper operating range.
Calibration and maintenance give you confidence in the results you receive and address any problems before they become urgent. You are buying yourself peace of mind in the long run.
Is my handheld XRF analyzer working correctly?
It should be noted that handheld XRF devices must be individually calibrated at the factory to ensure consistent performance. X-ray tubes and sensors have a limited shelf life and are consumables just like the light bulbs you use every day. So how do you know that your device is still working properly?
When you first unbox the XRF VANTA device, in addition to the device, battery, charger, and consumables, there is another important piece of equipment: the reference models that come with the device. Typically, you will receive a stainless steel model (316), but the device may also come with other models, depending on how you plan to use the device and the calibrations on it. Regardless of the type of model that came with the device, these samples will help you test your device to make sure you're getting the right results.
Most calibrators come in the form of thin metal discs (with or without certificates), or in mining applications you can get plastic cups containing soil or plastic samples. Regardless of the type of sample attached, your instrument has been factory calibrated using standard samples. When you think the analyzer gives an incorrect result, you can check by analyzing the sample provided and performing ten or more tests. Move multiple locations around the sample, including both sides of the sample and across different areas to ensure that elements of sample heterogeneity are eliminated. If the average elemental result is within each Min\Max range, the device is operating normally.
Tests to be performed when equipment is incorrect
What if the calibrator tests are incorrect? No need to worry too much. It may simply be that the test sample is dirty. Remember that X-rays are relatively weak and only penetrate a thin layer of metal surface? Even sticky oil and sweat can alter test results by blocking or distorting the element's spectrum. The first thing to do is to clean the sample with isopropyl alcohol (do not use household cleaners as these can damage the surface of the sample and leave residue and contamination elements). After cleaning, try performing the tests again. If good results are obtained, you need to store the sample in a cleaner environment.
If you still don't get the right result, turn off the machine and check the sensor window. Make sure the thin window covering is intact and not wrinkled or damaged. If the window cover is torn, punctured, or dirty, refer to your instruction manual for how to replace it with a new one (replacement covers are included in the appliance suitcase). After replacing the cover, try checking again.
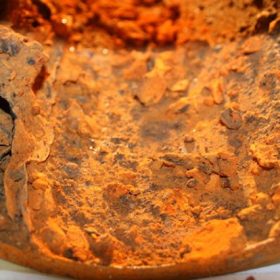
With alloy samples, you need to be sure that any rust or oxides have been removed (at least in an area large enough that the entire XRF window can come into contact with the clean sample area). You can use a rag to clean greasy samples but if the specimen is corroded you will need to sand it with diamond sandpaper or use a type of abrasive tool. Even with a sharpener, you need to be sure what material the wire brush is made of. If some debris from the brush gets on the sample, you may have the wrong alloy identified. Be sure to clean the sample after grinding or sanding. The same is true for sandpaper and abrasive discs – disc material can stick to the surface of the specimen and alter your readings.
Still not getting correct results? Make sure you have set the correct mode for your device. If you are using the 306 stainless steel model, but you have set the tester to GeoChem mode, the results obtained will not be optimal. Check your manual to make sure you are using the optimal settings.
Each X-ray tube on the device will have a different range of emission energies. The energy from the X-rays causes the atom to fluoresce (creating an element's signature), so each emitter will give a slightly different result. Therefore, your device needs to be calibrated at the factory to compensate for small changes in the emitter. Over time, emitters can change the output X-ray energy and affect measurement results. Like a filament light bulb, the X-ray tube will "old" and burn out after a period of use.
Essentially, the sensor is a highly sensitive surface and "lights up" when photons collide with it, but over time the sensor's sensitivity also fades. When this happens, the accuracy of the sensor may decrease. Like an X-ray tube, the sensor can fail, reducing sensitivity.
It is almost impossible to obtain a homogeneous sample in the wild (which is why a sample or reference standard is included with the instrument when it is delivered to the customer). Avoid losing or damaging the template! It's the easiest, cheapest way to determine if your equipment is properly calibrated. It is also important to remember that even in a homogeneous sample, elemental analyzes will vary from time to time, but overall accuracy will be within an acceptable range. The general rule for Alloy application is that as long as the analyzer identifies the correct sample (e.g. 316), the instrument is likely to remain within the calibration range. For other applications (such as soil analysis) you will need to check the actual elemental results.
If you're still not getting accurate results, it's time to call VISCO to have your instrument calibrated. We'll be able to answer your questions and guide you through troubleshooting and resolving the issue you're having.
