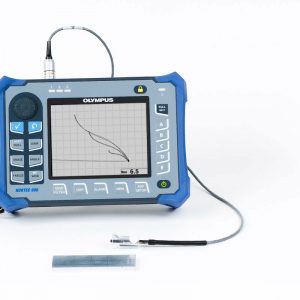
COATING THICKNESS GAGES for ALL Metal Substrates
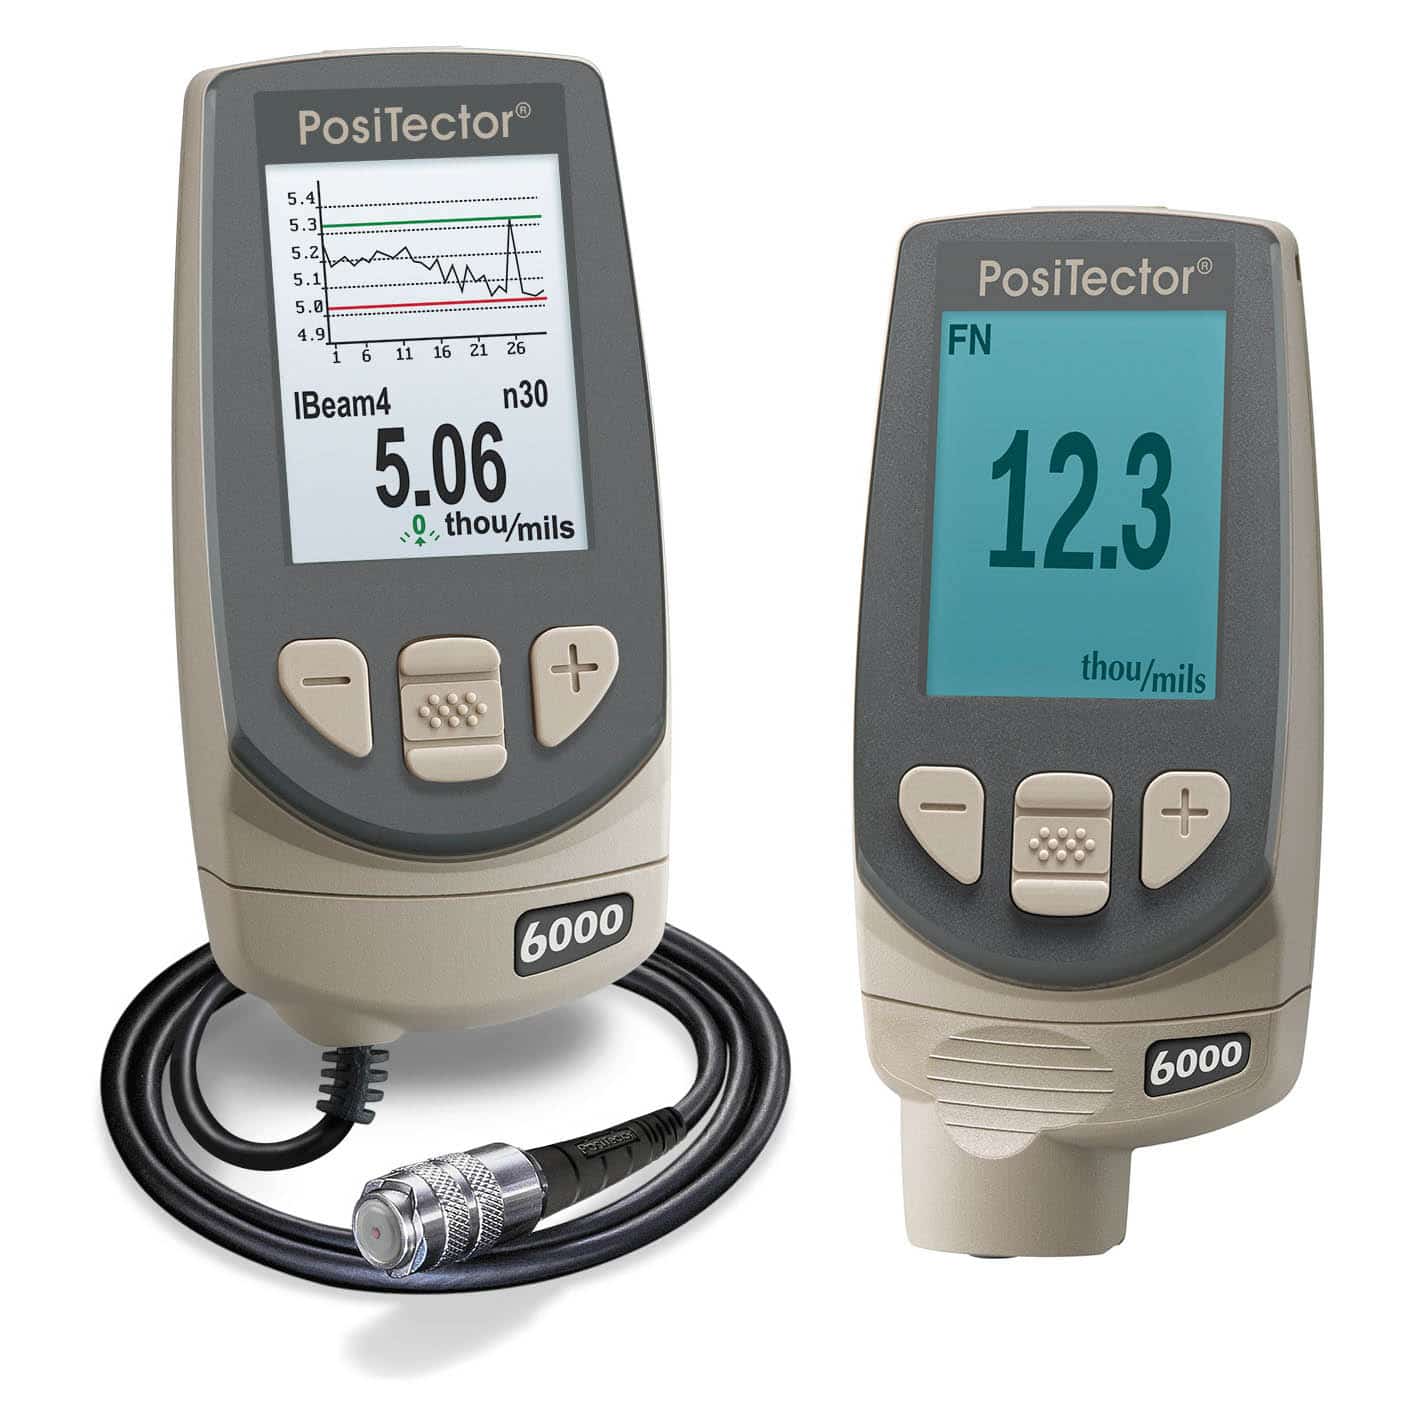
Rugged, fully electronic coating thickness gauges use magnetic and eddy current principles to measure coating thickness on both ferrous and non-ferrous metals, accurately and quickly.
Simple
- Ready to measure — no calibration adjustment required for most applications
- High contrast, reversible color LCD
- Enhanced one-handed menu navigation
- Flashing display — ideal in a noisy environment
- RESET feature instantly restores factory settings
Durable
- Solvent, acid, oil, water and dust resistant – weatherproof
- Wear-resistant probe tip
-
Shock-absorbing, protective rubber holster with belt clip
- Two year warranty on gage body AND probe
Accurate
- Certificate of Calibration showing traceability to NIST or PTB included (Long Form)
- Built-in temperature compensation ensures measurement accuracy
- Hi-RES mode increases displayed resolution for use on applications that require greater precision
- Conforms to national and international standards including ISO and ASTM
Versatile
- PosiTector body accepts all PosiTector 6000, 200, DPM, UTG, RTR and SPG probes easily converting from a coating thickness gage to a dew point meter, surface profile gage or wall thickness gage.
- Multiple Calibration adjustment options including 1 point, 2 point, known thickness, average zero
-
Selectable display languages
- Hi Contrast backlit display for bright or dark environments
-
Flip display enables right-side-up viewing
- Extended cables available (up to 75 m/250 ft) for underwater or remote measuring
- Uses alkaline or rechargeable batteries (built-in charger)
Powerful
-
Statistics mode continually displays/updates average, standard deviation, min/max thickness and number of readings while measuring
- HiLo alarm audibly and visibly alerts when measurements exceed user-specified limits
- FAST mode – faster measurement speed for quick inspection
-
USB port for fast, simple connection to a PC and to supply continuous power. USB cable included
- Software updates via web keep your gage current
- Screen Capture – record and save image into USB flash memory for record keeping and review
- Software Solutions for viewing, analyzing & reporting data:
- PosiSoft USB Drive – stored readings and graphs can be accessed using universal PC/ Mac web browsers or file explorers. No software required
- PosiSoft Desktop – desktop software (PC/Mac) for downloading, viewing, printing and storing measurement data. Available as a free download.
- PosiSoft.net account – a free web-based application offering secure storage of thickness readings
- PosiTector App – (Advanced models only) – Mobile app connects PosiTector Advanced instruments to your iOS or Android smart device.
- Every stored measurement is date and time stamped
Step 1: Select a PosiTector body (Standard or Advanced features)

Includes all features shown on Overview page plus…
- Storage of 250 readings—stored readings can be viewed or downloaded
Advanced Models
Includes all features shown on Overview page plus…
- Storage of 100,000 readings in up to 1,000 batches and sub-batches—stored readings can be viewed or downloaded
- Batch Annotation – Create meaningful batch names and enter notes directly on the instrument using a familiar on-screen QWERTY keyboard.
- WiFi technology – wirelessly synchronizes with PosiSoft.net, downloads software updates and connects to mobile devices for expanded functionality
- Bluetooth Wireless Technology for data transfer to a computer or optional portable printer
- SCAN mode – take continuous readings without lifting the probe
- Multiple stored calibration adjustments for measuring on a wide variety of substrate conditions
- SSPC PA2 feature set determines if film thickness over a large area conforms to user-specified min/max levels
PSPC 90/10 feature determines if a coating system complies with an IMO performance standard for protective coatings
- PosiTector App – Mobile app connects PosiTector Advanced instruments to your iOS or Android smart device
- Auto-pairing Bluetooth BLE connection
- Easily create custom reports from your measurement data in seconds
- Export readings to PosiSoft Desktop or synchronize readings with PosiSoft.net for further reporting and archival options
Compare Standard and Advanced: PosiTector Body Comparison Chart
Select from a variety of measurement ranges and probe styles to suit your application. All PosiTector bodies accept all probes.
For probe selection, visit our Probe Details page
Select from a variety of measurement ranges and probe styles
The PosiTector 6000 consists of a body and a probe. A wide selection of interchangeable probes are available. All bodies accept all probes. Video Overview Two (2) year probe warranty
- Heavy-duty, gold-plated locking connector for industrial environments
- Certificate of Calibration (Long Form) traceable to NIST or PTB included with every probe
- Each probe retains its own unique calibration information (allowing full probe interchangeability)
- Extended cables available for underwater or remote measuring. Specify length when ordering
- Probes are PosiTector SmartLink compatible – wirelessly connect PosiTector 6000 probes to your smart device
Probe Ordering Guide:
F – for ferrous metals (steel and cast iron)
WOMEN – for non-ferrous metals (aluminum, copper, titanium, etc.)
FN – for all metal substrates – Automatically recognizes the substrate and takes a measurement
| Probe Model | Substrates | Probe Style | Measuring Range |
| F | ferrous | removable built-in | 0 – 60 mils (0 – 1500 um) |
| FS | ferrous | regular cabled | 0 – 60 mils (0 – 1500 um) |
| FXS Xtreme™ | ferrous | regular cabled | 0 – 60 mils (0 – 1500 um) |
| FRS | ferrous | 90° regular cabled | 0 – 60 mils (0 – 1500 um) |
| F0S | ferrous | 0° microprobe | 0 – 45 mils (0 – 1150 um) |
| F45S | ferrous | 45° microprobe | 0 – 45 mils (0 – 1150 um) |
| F90S | ferrous | 90° microprobe | 0 – 45 mils (0 – 1150 um) |
| FT | ferrous | removable built-in | 0 – 250 mils (0 – 6 mm) |
| FTS | ferrous | high-range cabled | 0 – 250 mils (0 – 6 mm) |
| FKS | ferrous | high-range cabled | 0 – 500 mils (0 – 13 mm) |
| FHXS Xtreme™ | ferrous | high-range cabled | 0 – 400 mils (0 – 10000 um) |
| FLS | ferrous | high-range cabled | 0 – 1.5 inches (0 – 38 mm) |
| WOMEN | non-ferrous | removable built-in | 0 – 60 mils (0 – 1500 um) |
| NS | non-ferrous | regular cabled | 0 – 60 mils (0 – 1500 um) |
| NRS | non-ferrous | 90° regular cabled | 0 – 60 mils (0 – 1500 um) |
| NAS | non-ferrous | regular cabled | 0 – 25 mils (0 – 625 um) |
| N0S | non-ferrous | 0° microprobe | 0 – 25 mils (0 – 625 um) |
| N45S | non-ferrous | 45° microprobe | 0 – 25 mils (0 – 625 um) |
| N90S | non-ferrous | 90° microprobe | 0 – 25 mils (0 – 625 um) |
| NKS | non-ferrous | high-range cabled | 0 – 500 mils (0 – 13 mm) |
| FN | ferrous / non-ferrous | removable built-in | 0 – 60 mils (0 – 1500 um) |
| FNS | ferrous / non-ferrous | regular cabled | 0 – 60 mils (0 – 1500 um) |
| FNRS | ferrous / non-ferrous | 90° regular cabled | 0 – 60 mils (0 – 1500 um) |
| FNDS (duplex) | ferrous / non-ferrous | regular cabled | 0 – 60 mils (0 – 1500 um) |
| FNTS | ferrous / non-ferrous | high-range cabled | 0 – 250 mils (0 – 6 mm) |
| FNGS | ferrous / non-ferrous | high-range cabled | 0 – 2.5 inches (0 – 63.5 mm) |
Probe Details
| Removable Built-in probes (F, N, FN, FT)Ideal for one-handed operation. |
|
| Removable Built-in Probe |
Probe Model: | F | WOMEN | FN | FT |
| Range: | 0 – 60 mils | 0 -250 mils | |||
| 0 – 1500 um | 0 – 6 mm 0 – 6000 μm |
||||
| Accuracy*: | + (0.05 mils + 1%) 0 – 2 mils + (0.1 mils + 1%) > 2 mils |
+ (0.5 mils + 1%) 0 – 100 mils + (0.5 mil + 3%) > 100 mils |
|||
| + (1 um + 1%) 0 – 50 um + (2 um + 1%) > 50 um |
+ (0.01 mm + 1%) 0 – 2.5 mm + (0.01 mm + 3%) > 2.5 mm |
||||
| *Accuracies are stated as a fixed value plus a percentage of the gage’s actual reading. | |||||
Separate Regular Probes
| FS, NS, FNS, NAS, FTS
These constant-pressure, stainless steel probes are hermetically sealed to be totally waterproof – ideal for underwater use. |
|
| Regular | Probe Model: | FS | NS | FNS | NAS | FTS |
| Range: | 0 – 60 mils | 0 -25 mils | 0 -250 mils | |||
| 0 – 1500 um | 0 – 625 um | 0 – 6 mm 0 – 6000 μm |
||||
| Accuracy*: | + (0.05 mils + 1%) 0 – 2 mils + (0.1 mils + 1%) > 2 mils |
+ (0.02 mils + 1%) 0 – 4 mils + (0.1 mils + 3%) > 4 mils |
+ (0.5 mils + 1%) 0 – 100 mils + (0.5 mil + 3%) > 100 mils |
|||
| + (1 um + 1%) 0 – 50 um + (2 um + 1%) > 50 um |
+ (.5 um + 1%) 0 – 100 um + (2 um + 3%) > 100 um |
+ (0.01 mm + 1%) 0 – 2.5 mm + (0.01 mm + 3%) > 2.5 mm |
||||
| *Accuracies are stated as a fixed value plus a percentage of the gage’s actual reading. | ||||||
| FXS Xtreme™
Uniquely designed for rugged applications. The FXS Xtreme™ probe with zirconia-toughened alumina wear face is ideal for rough steel surfaces. Enhanced measuring speed of 50+ readings per minute makes it ideal for measuring large, rough surfaces quickly. Scan mode increases measurement rate to over 100 readings per minute (PosiTector Advanced only). Compatible with PosiTector bodies with serial numbers greater than 700,000. |
|
| FXS Xtreme™ | ||||
| Range: | 0 – 1500 um | |||
| 0 – 60 mils | ||||
| Accuracy*: | + (0.05 mils + 1%) 0 – 2 mils + (0.1 mils + 1%) > 2 mils |
|||
| + (1 um + 1%) 0 – 50 um + (2 um + 1%) > 50 um |
||||
| *Accuracies are stated as a fixed value plus a percentage of the gage’s actual reading. | ||||
Separate 90° Regular Probes
| FRS, NRS, FNRS
Right angle probe for measuring within areas of low headroom. These constant-pressure, stainless steel probes are hermetically sealed to be totally waterproof – ideal for underwater use. |
|
| 90 Regular | Probe Model: | FRS | NRS | FNRS |
| Range: | 0 – 60 mils | |||
| 0 – 1500 um | ||||
| Accuracy*: | + (0.05 mils + 1%) 0 – 2 mils + (0.1 mils + 1%) > 2 mils |
|||
| + (1 um + 1%) 0 – 50 um + (2 um + 1%) > 50 um |
||||
| *Accuracies are stated as a fixed value plus a percentage of the gage’s actual reading. | ||||
FNDS Probe for Duplex Coatings
| The PosiTector 6000 FNDS probe measures the individual thicknesses of both the paint and the zinc layers in a duplex coating system with a single reading.
Duplex coating systems use a combination of two corrosion protection systems – typically paint or powder coating over galvanized steel (hot-dip, electro or zinc spray metallizing). The resultant corrosion protection is superior to either protection system used independently. In Duplex mode, the PosiTector 6000 FNDS utilizes both magnetic (ferrous) and eddy current (non-ferrous) principles simultaneously to calculate and display the individual paint and zinc layer thicknesses. The magnetic principle is used to measure the combined paint/zinc thickness over the ferrous substrate, and the eddy current principle is used to measure the paint thickness over the non-ferrous zinc coating. The zinc thickness is calculated by subtracting the paint thickness from the combined paint/zinc thickness measurement. When disabled, the gage will operate like a conventional combination ferrous/non-ferrous instrument (similar to PosiTector 6000 FNS probe). Ideal for measuring non-magnetic coatings over steel and non-conductive coatings over non-ferrous metal substrates. Compatible with PosiTector Advanced (serial numbers 730,000+) and PosiTector Standard gage bodies with a color display. A Simple gage update may be required.
|
|
| FNDS | |||||
| Range: | 0 – 60 mils 0 – 1500 um |
||||
| EASY U P L E X |
Minimum Zinc Thickness: | 0.5 mil (13 um) | |||
| Paint Layer Accuracy*: | Mils | + (0.05 mils + 1%) 0 – 2 mils + (0.1 mils + 1%) > 2 mils |
|||
| Microns | + (1 um + 1%) 0 – 50 um + (2 um + 1%) > 50 um |
||||
| Zinc Layer Accuracy*: | Mils | + (0.1 mils + 1%) 0.5 – 2 mils + (0.2 mils + 1%) > 2 mils |
|||
| Microns | + (2 um + 1%) 13 – 50 um + (4 um + 1%) > 50 um |
||||
| *Accuracies are stated as a fixed value plus a percentage of the gage’s actual reading. | |||||
Separate 0° Microprobes
| F0S, N0S
With our smallest measuring tip and best thin-film accuracy, this instrument is ideal for measuring on small parts, hard-to-reach areas, or close to edges. |
|
| The straight F0S and N0S Microprobes have a quick release adapter that makes them constant pressure probes for alignment on small, flat or curved parts. This adapter is held in place by a spring. If the sleeve is not required, simply pull it off the probe. | |
| 0 Microprobe | Probe Model: | F0S | N0S |
| Range: | 0 – 45 mils | 0 – 25 mils | |
| 0 – 1150 um | 0 – 625 um | ||
| Accuracy*: | + (0.02 mils + 1%) 0 – 4 mils + (0.1 mils + 3%) > 4 mils |
||
| + (0.5 um + 1%) 0 – 100 um + (2 um + 3%) > 100 um |
|||
| *Accuracies are stated as a fixed value plus a percentage of the gage’s actual reading. | |||
Separate 45° Microprobes
| F45S, N45S
With our smallest measuring tip and best thin-film accuracy, this instrument is ideal for measuring on small parts, hard-to-reach areas, or close to edges. |
|
| 45 Microprobe | Probe Model: | F45S | N45S |
| Range: | 0 – 45 mils | 0 – 25 mils | |
| 0 – 1150 um | 0 – 625 um | ||
| Accuracy*: | + (0.02 mils + 1%) 0 – 4 mils + (0.1 mils + 3%) > 4 mils |
||
| + (0.5 um + 1%) 0 – 100 um + (2 um + 3%) > 100 um |
|||
| *Accuracies are stated as a fixed value plus a percentage of the gage’s actual reading. | |||
Separate 90° Microprobes
| F90S, N90S
Right angle probe for measuring within areas of low headroom. With our smallest measuring tip and best thin-film accuracy, this instrument is ideal for measuring on small parts, hard-to-reach areas, or close to edges. |
|
| 90 Microprobe | Probe Model: | F90S | N90S |
| Range: | 0 – 45 mils | 0 – 25 mils | |
| 0 – 1150 um | 0 – 625 um | ||
| Accuracy*: | + (0.02 mils + 1%) 0 – 4 mils + (0.1 mils + 3%) > 4 mils |
||
| + (0.5 um + 1%) 0 – 100 um + (2 um + 3%) > 100 um |
|||
| *Accuracies are stated as a fixed value plus a percentage of the gage’s actual reading. | |||
High-Range Probes
| FT, FTS, FNTS, FKS, NKS
Ideal for thick protective coatings such as epoxy, rubber, concrete liners, intumescent fireproofing and more. |
|
| High-Range | Probe Model: | FT | FTS | FNTS | FKS | NKS | ||
| Range: | 0 -250 mils | 0 -500 mils | ||||||
| 0 – 6 mm 0 – 6000 μm |
0 – 13 mm | |||||||
| Accuracy*: | + (0.5 mils + 1%) 0 – 100 mils + (0.5 mil + 3%) > 100 mils |
+ (1 mils + 3%) 0 – 500 mils+ (0.02 mm + 3%) 0 – 13 mm |
||||||
| + (0.01 mm + 1%) 0 – 2.5 mm + (0.01 mm + 3%) > 2.5 mm |
||||||||
| FT | FTS | FNTS,FKS,NKS | *Accuracies are stated as a fixed value plus a percentage of the gage’s actual reading. | |||||
| FHXS Xtreme™ Measures non-conductive coatings on steel substrates.
FHXS Xtreme™ probe with Alumina wear face and braided cable for hot or rough surfaces. Hot surfaces up to 250° C (500° F). Compatible with PosiTector bodies with serial numbers greater than 700,000 and the new PosiTector SmartLink. |
|
| FHXS Xtreme™ | ||||
| Range: | 0 – 10,000 um | |||
| 0 – 400 mils | ||||
| Accuracy*: | + (0.1 mils + 3%) | |||
| + (2 um + 3%) | ||||
| *Accuracies are stated as a fixed value plus a percentage of the gage’s actual reading. | ||||
| FLS
Measures intumescent paint and other thick protective coatings on steel.
Compatible with PosiTector bodies with serial numbers greater than 700,000 and the new PosiTector SmartLink. |
|
| FLS | ||||
| Probe Weight: 0.7 kg (1.5 lbs) | Range: | 0 – 38 mm | ||
| 0 – 1.5 inches | ||||
| Accuracy*: | + (0.01 in. + 3%) | |||
| + (0.2 mm + 3%) | ||||
| Minimum Surface Area: | 3.25 x 3.25 in. (83 x 83 mm) | |||
| Minimum Substrate Thickness: | 0.1 in. (2.5 mm) | |||
| *Accuracies are stated as a fixed value plus a percentage of the gage’s actual reading. | ||||
| FNGS
Measures very thick coatings on ALL metals. Ideal for measuring ship hull coatings and thick intumescent paints.
Compatible with PosiTector bodies with serial numbers greater than 700,000 and the new PosiTector SmartLink. |
|
| FNGS | ||||
|
Probe Weight: 1.8 lbs / 0.8 kg |
Range: | 0 – 63.5 mm
0 – 2.5 inches |
||
| Accuracy*: | + (0.01 in. + 3%)
+ (0.2 mm + 3%) |
|||
| Minimum Surface Area: |
10 x 10 in. (254 x 254 mm) | |||
| Minimum Substrate Thickness: |
0.2 in. (5 mm) | |||
| *Accuracies are stated as a fixed value plus a percentage of the gage’s actual reading. | ||||
